An assignment is the prompt students answer, plus a few decisions around it: how much AI students may use, when it is due, and whether students can see it yet. All of it lives on one page.
Starting one
Open a class and choose New assignment (or Build your first assignment on an empty class). You land on the assignment's page, which is laid out as five numbered steps down the left: Assignment, Rubric, Validate, Grade, Report. This article is step one; Open on that row opens the prompt builder.
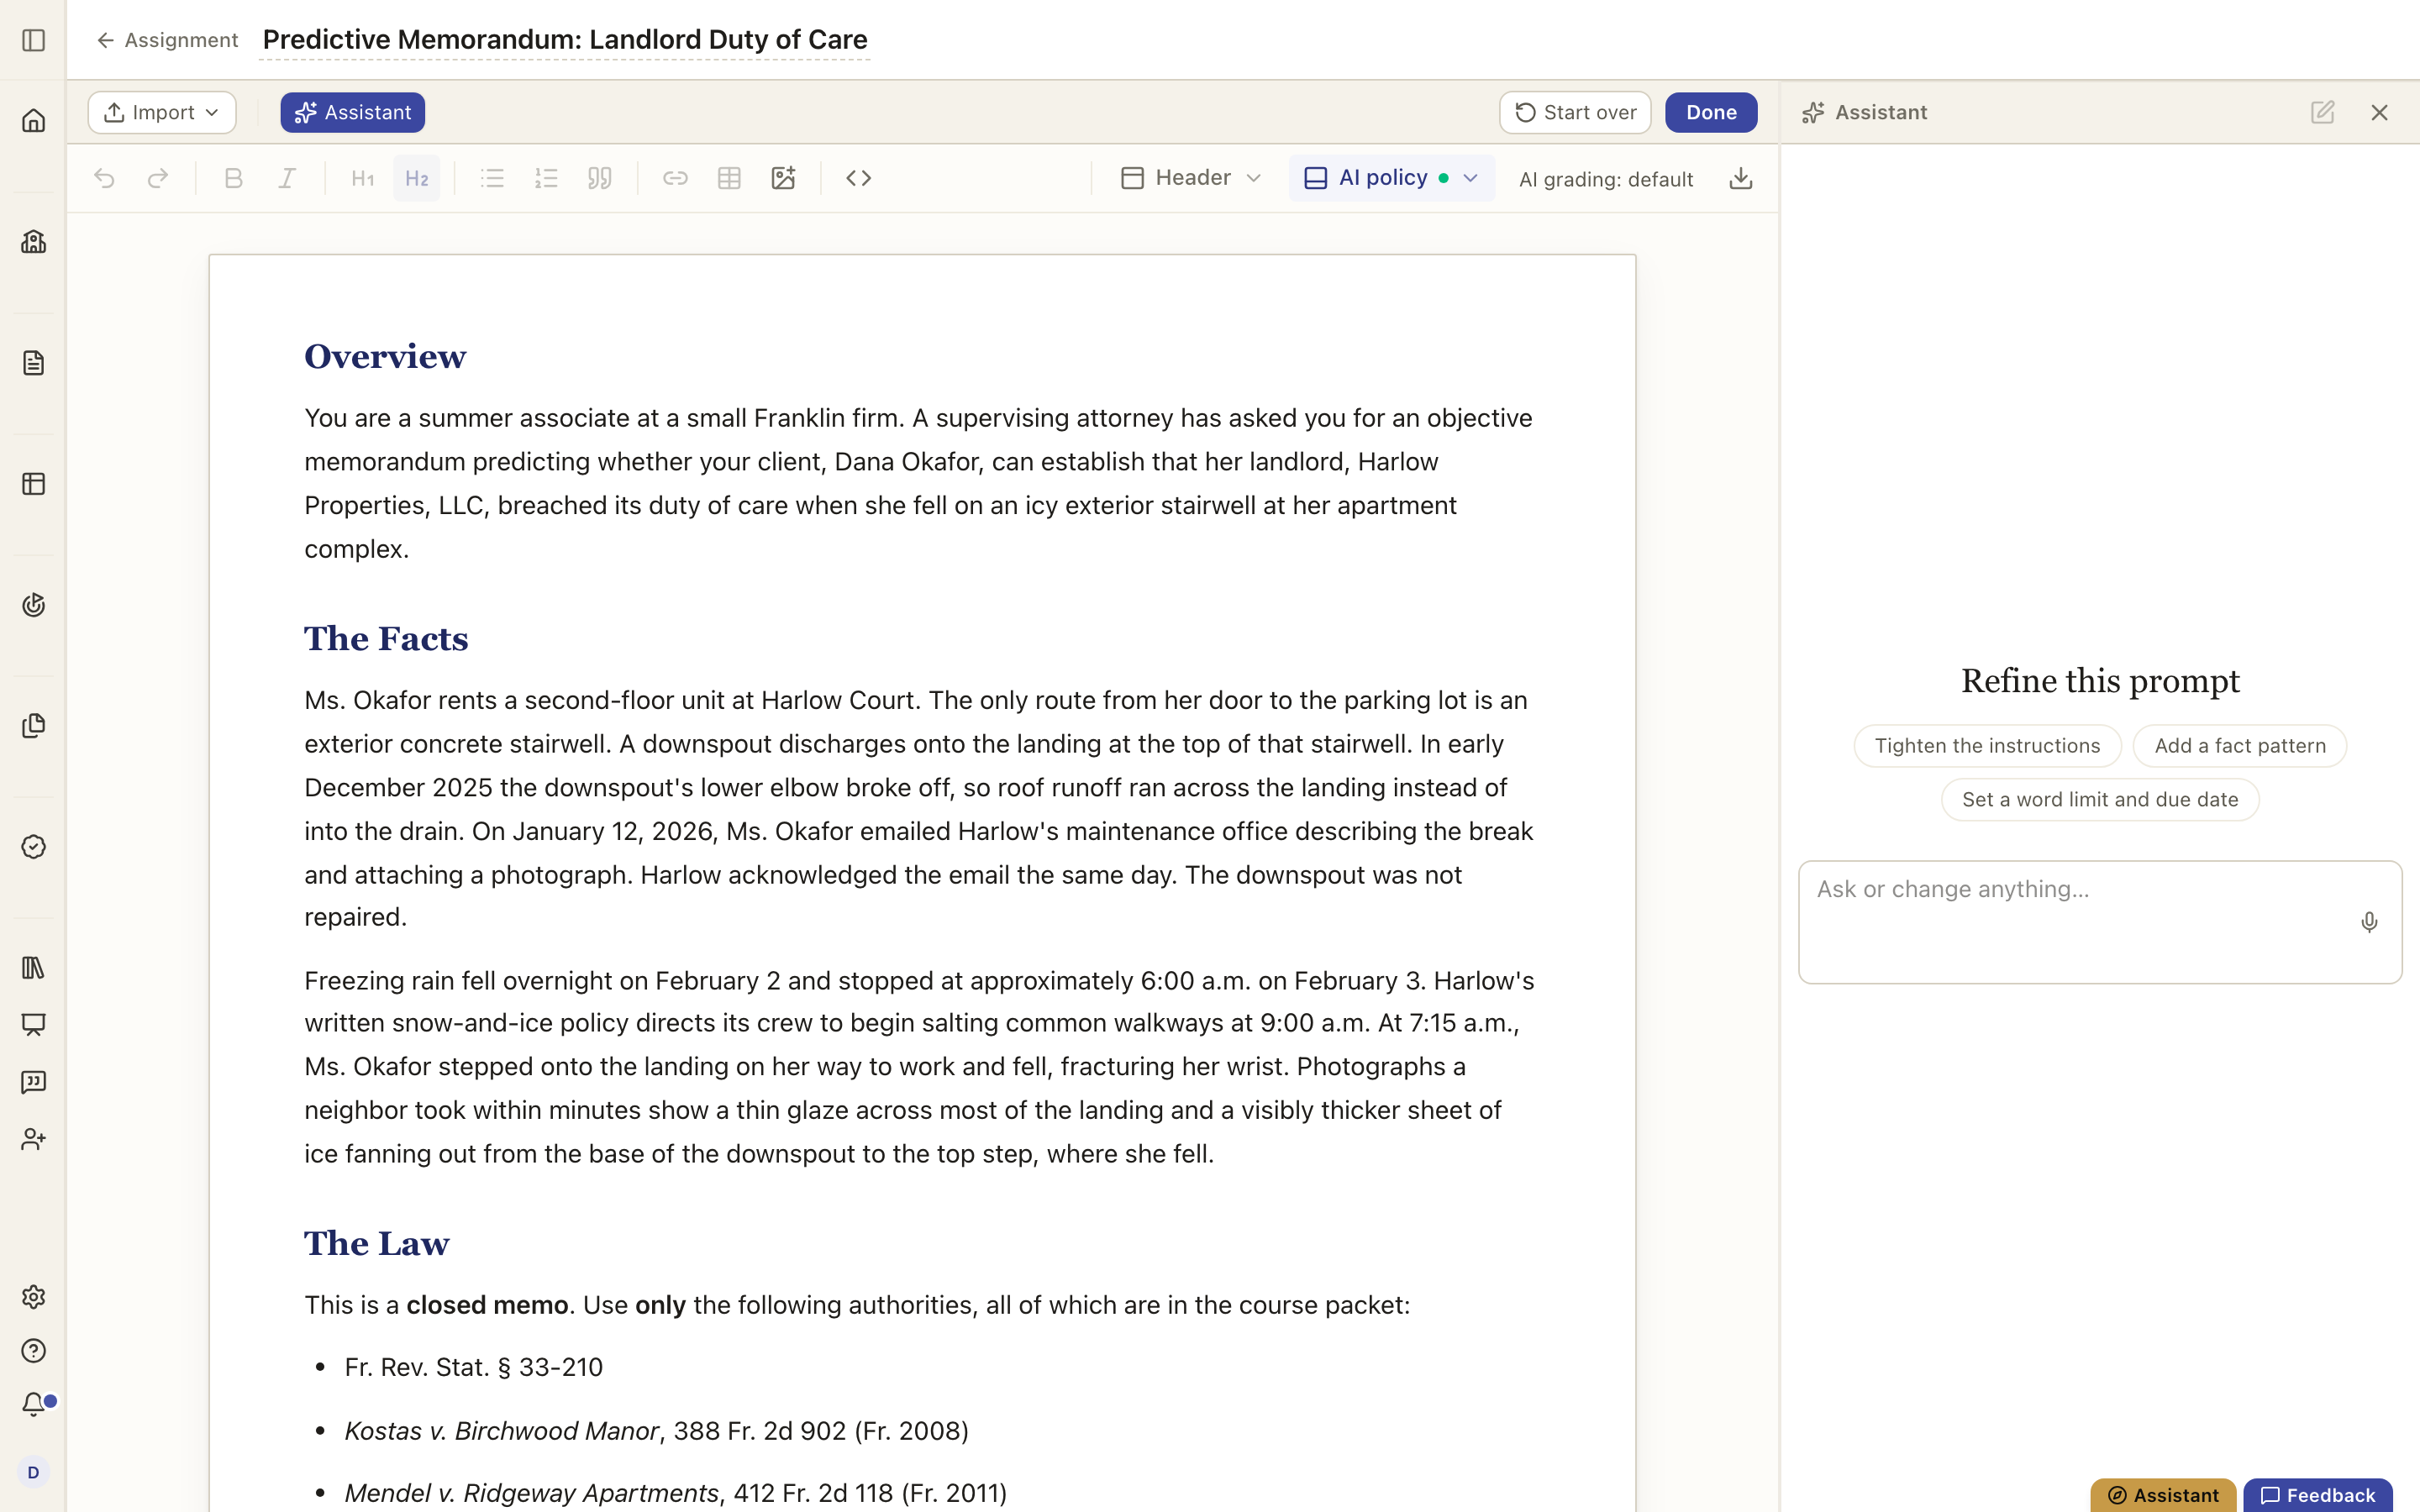
Getting the prompt in
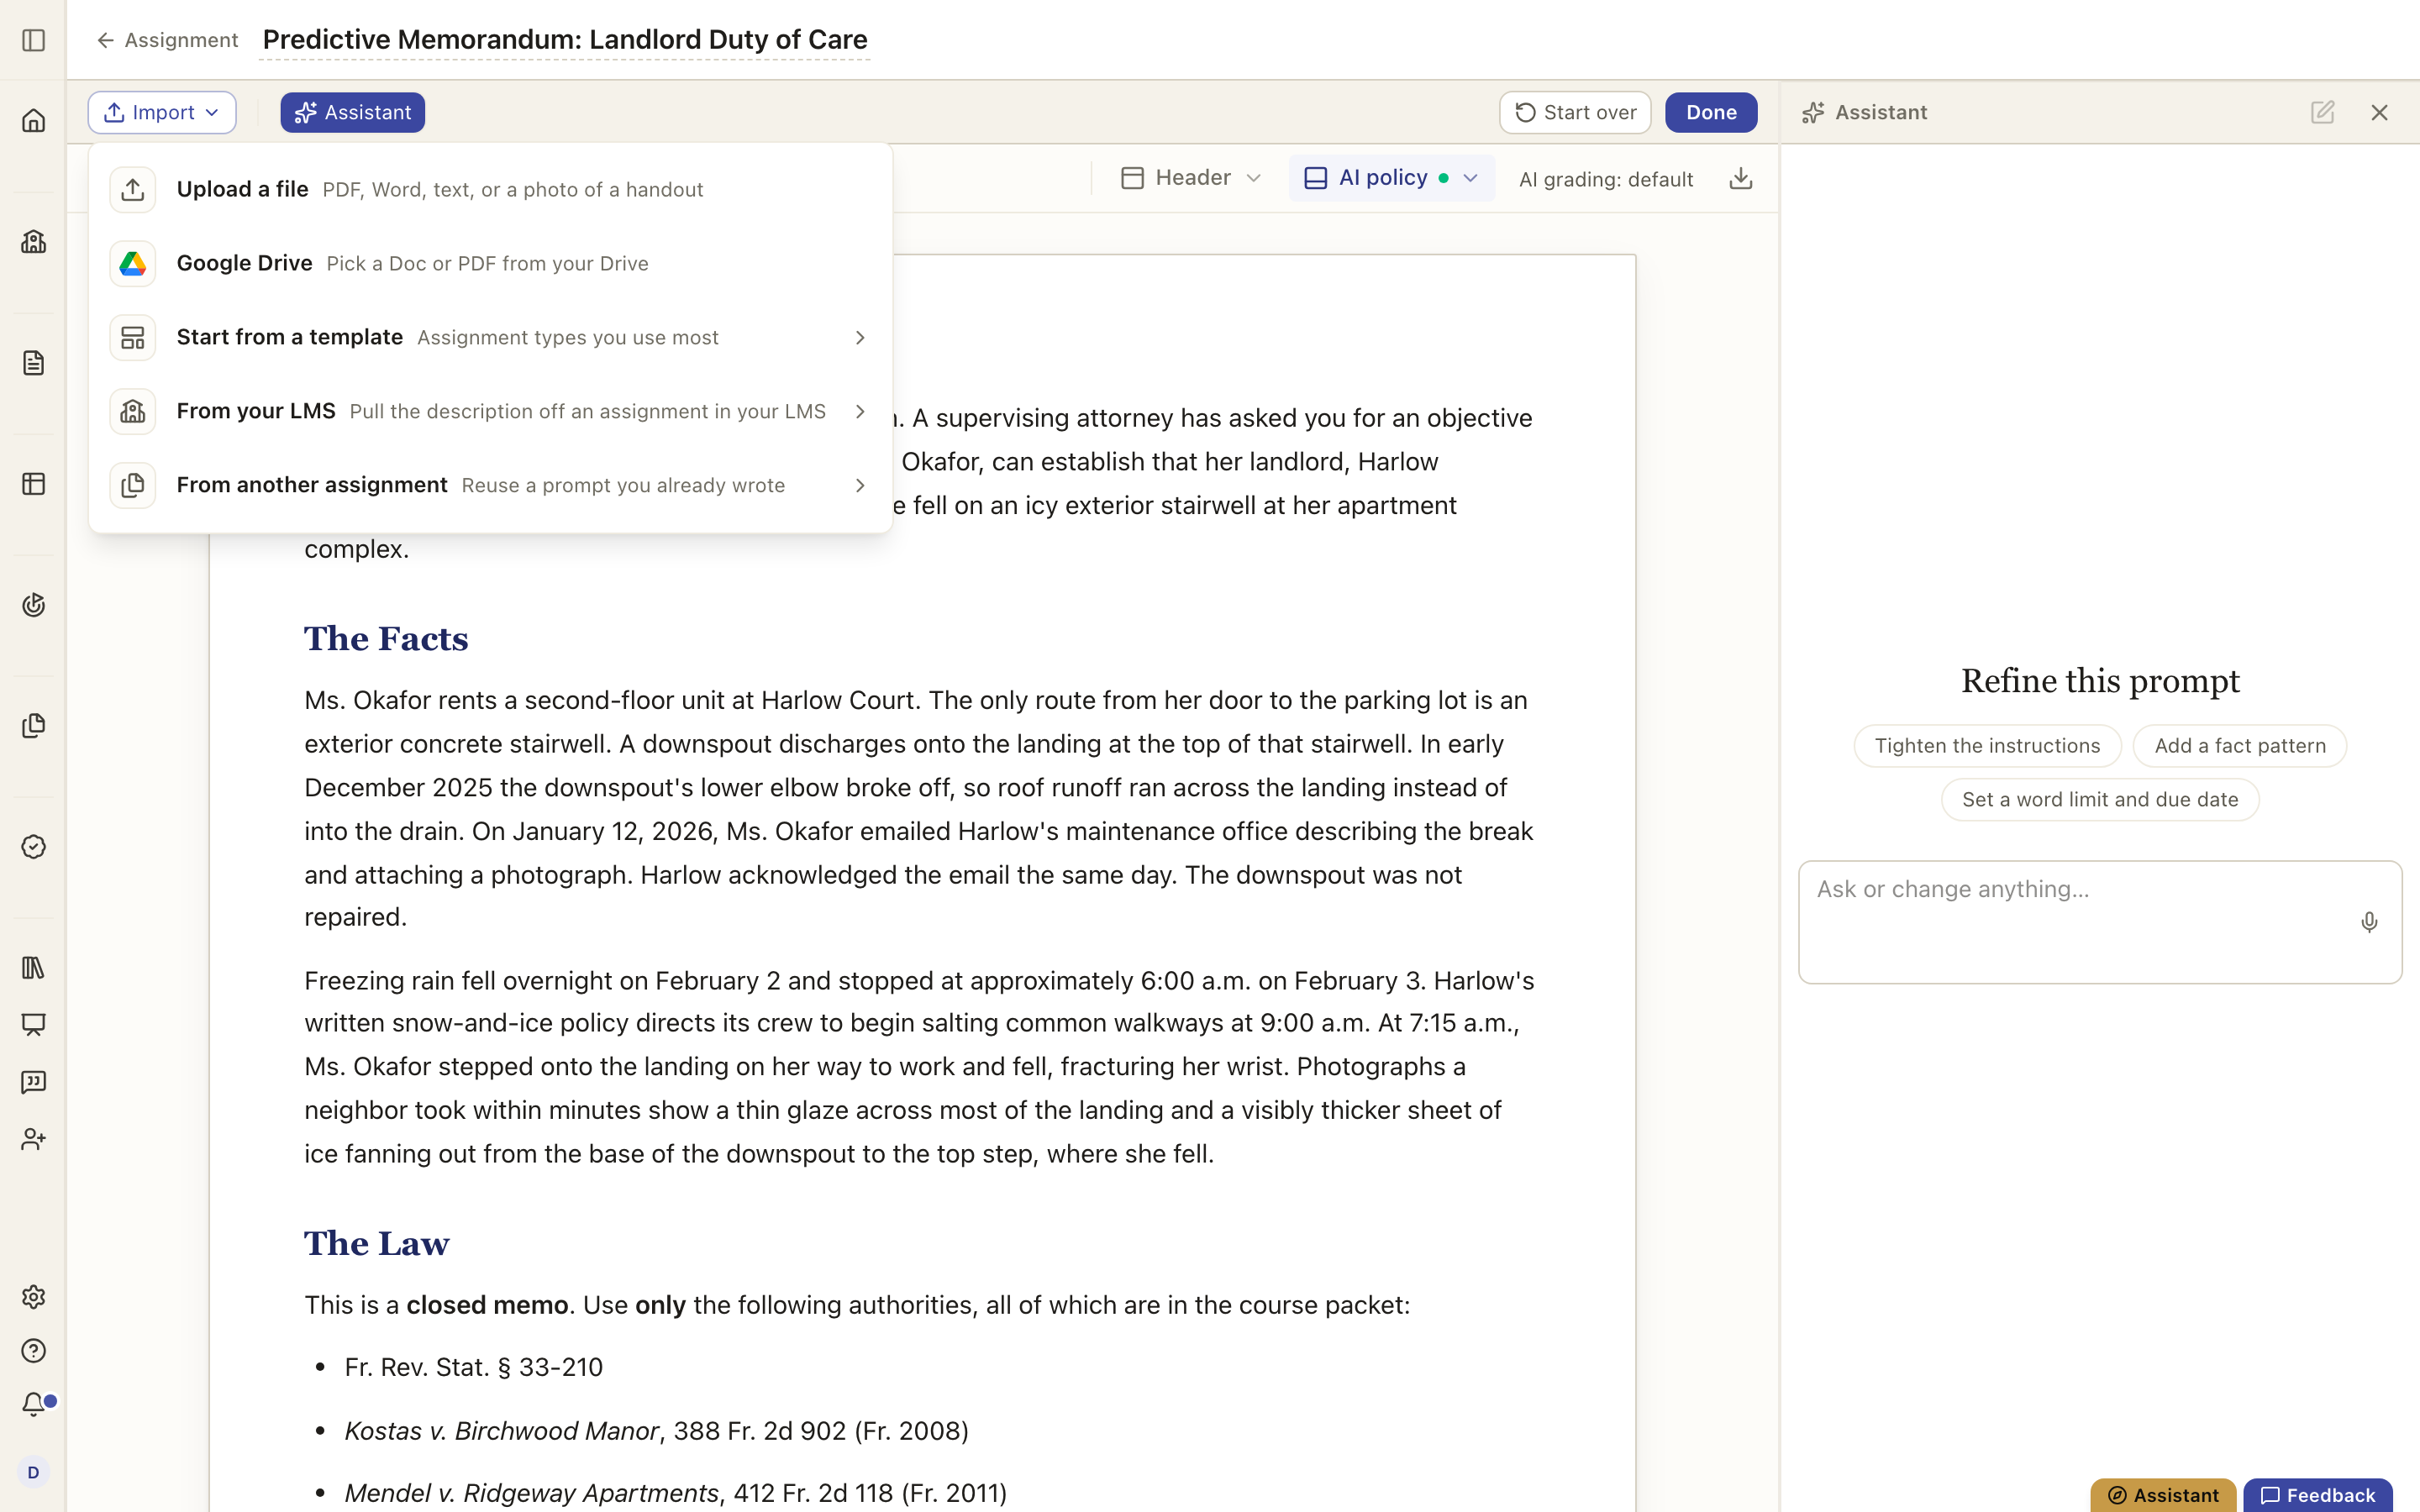
Type the name at the top, then write the prompt in the editor, or bring one in through Import in the toolbar. Every way in sits behind that one button:
- Upload a file: a PDF, Word document, text file, or a photo of a handout. The assistant reads it and drafts the prompt from it, streaming onto the page as it goes.
- From Library: start from something that already exists. The panel has a shelf for each place a prompt can come from (Shared with me for assignments your department published, My assignments for prompts you already wrote in any of your classes, and Templates for common assignment types) and one search across all of them.
- Google Drive: pick a Doc or PDF straight from your Drive. If Drive is not connected yet, the row says so and takes you to connect it first. See Connecting Google Drive.
- From your LMS: pull the prompt from an assignment that already exists in Canvas, Moodle, Blackboard or Brightspace, and link the two so grades flow back. See Connecting your LMS.
Refining it with the assistant
The Assistant panel on the right edits the prompt with you. It offers a few starting moves (Tighten the instructions, Add a fact pattern, Set a word limit and due date) or you can type what you want changed. It rewrites the prompt on the page; you keep what you like. Start over clears the prompt to a blank page, and Cmd Z (Ctrl Z on Windows) brings it back if you did not mean it.
The two stamps
Two controls in the toolbar add standard blocks to the student handout rather than to the prompt itself:
- Header stamps a standardized header (course, instructor, due date) at the top.
- AI policy stamps the student AI-use statement at the bottom. The level is the one you chose for this assignment; you can also edit the wording of each level. What the four levels mean is in Setting the AI policy on an assignment.
Deciding how it is graded
Back on the assignment page, the Assignment row carries the decisions that are not prose:
- AI is the AI-use policy for students, the same four levels as the stamp.
- Due sets a due date and time. Accept late work adds a late window after it. No due date is a valid choice.
- Grading on arrival is whether papers are graded the moment they arrive (a student submitting, an upload, an LMS import) or held for you. It is one setting for your whole account, in Settings under Grading & feedback. When it is off, the Grade step shows a Grading on arrival: Off chip that links straight to it. Holding never stops you: Grade all still runs whenever you press it. See How grading works.
Publishing to students
Publishing is not one of the five steps, because it belongs to no point in the order: you might publish the prompt on day one before the rubric exists, or never publish at all because every paper arrives from Canvas or an upload. So it lives in the header, beside the name, as the Students control.
Open it to switch between Published and Unpublished. Published means students see the assignment in the LawGrader student portal and can submit there. Unpublished means they do not; grading and released grades are unaffected either way, and a class connected to an LMS is governed by what that LMS shows. Opens on a date instead schedules the reveal for later.
Done
Done in the builder returns you to the assignment page. Everything saves as you go, so Done is a navigation, not a save. The next step is the rubric: see Building a rubric.