The right-hand Grade rail is where a score is made and explained. This article reads it top to bottom: the control that decides how much of the assistant's work is drawn, the criterion cards, the explanation behind each score, and the filter that tames a busy margin.
Manual, Score, Feedback
At the top of the page sits the assist control. It is not a ladder; it is a manual base plus two independent capabilities, and either can be on without the other.

- Manual is your marks only. Both capabilities off: the rail shows the rubric with empty scores, the margin shows your own comments, and nothing you do is compared to anything.
- Score draws the assistant's proposed score on each criterion card, with its explanation. Turning it off clears the proposals from this paper; your own picks stay.
- Feedback draws the assistant's written observations in the margin. It is a view filter: turning it off hides them, turning it back on shows the same ones. Nothing is added or removed.
A paper can show scores without feedback (you want the number, you will write the words) or feedback without scores (you want the reading, you will grade by hand). The ▶ button beside the control runs the assistant; on a graded paper it becomes Re-grade this paper. See When a grade needs a second try.
The criterion cards
One card per criterion, in rubric order. On a levels criterion the card is the ladder: the levels from strongest to weakest, the one the assistant chose marked, and the points each pays. Click another level to override; your pick wins and the total updates. A bar under the name shows where the score sits in the criterion's range. On a criterion scored by rules the card is a rules drawer instead; see Scoring a criterion with rules.
A card that the assistant was unsure about, or that landed on a level boundary, is marked for review, and Review N on the assignment page counts those across the class.
Where the points went
Every card carries two expanders.
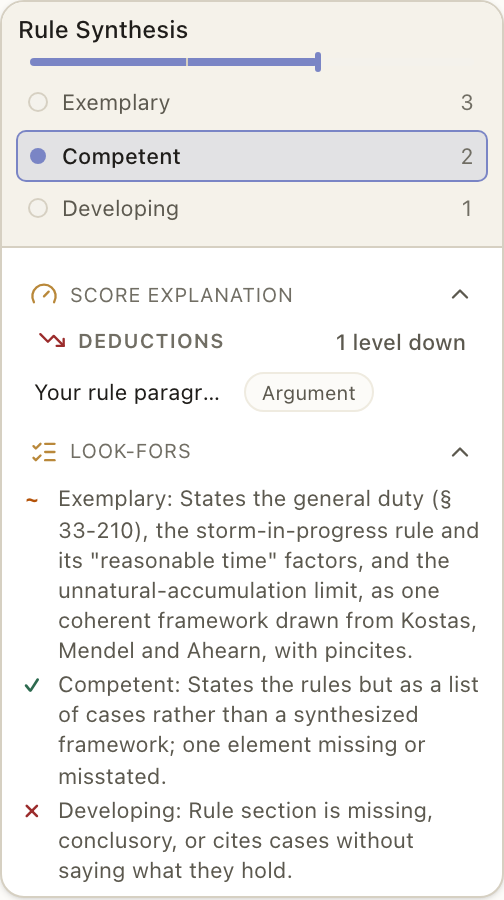
Score explanation is the ledger. Deductions lists each finding that cost points, with its cost ("1 level down", "−2") and a chip naming what kind of problem it was; Praise lists the strengths the assistant credited; Adjustment appears when a rule moved the score after the fact. Each line is a door: click it to jump to the passage in the paper. Hover it for two more: the scales icon (Change the points for this note) and Remove. With a note's scales open, the criterion card sets that note: press + or − on a points criterion, or pick a level on a levels criterion, and the note's share shows on the card. Under the note you can say why, which is optional: Wrong removes the note and reports it to our team; Too harsh or Too soft (after you change the points) keeps the note and teaches the assistant; Fix rubric saves and opens that criterion in the rubric builder, and Done brings you back; Other lets you type your own reason. Pick nothing and the change is saved without teaching anything. A repriced line shows what it was, and a note you sent to the rubric keeps a Rubric tag with Open in rubric until the rubric flag is settled. If the itemized deductions do not add up to the points lost, the drawer says so and asks you to review.
Look-fors shows the criterion's level descriptions, or its checklist, with a mark against each: met, partly met, or missed, as the assistant read the paper. This is the fastest way to see why a paper landed on Competent rather than Exemplary: the Exemplary description will carry a ~ or ✗ on the specific thing that was missing.
Filtering the margin
A graded paper can carry a dozen or more margin cards. The filter button at the top of the Comments column (beside the +) narrows them:
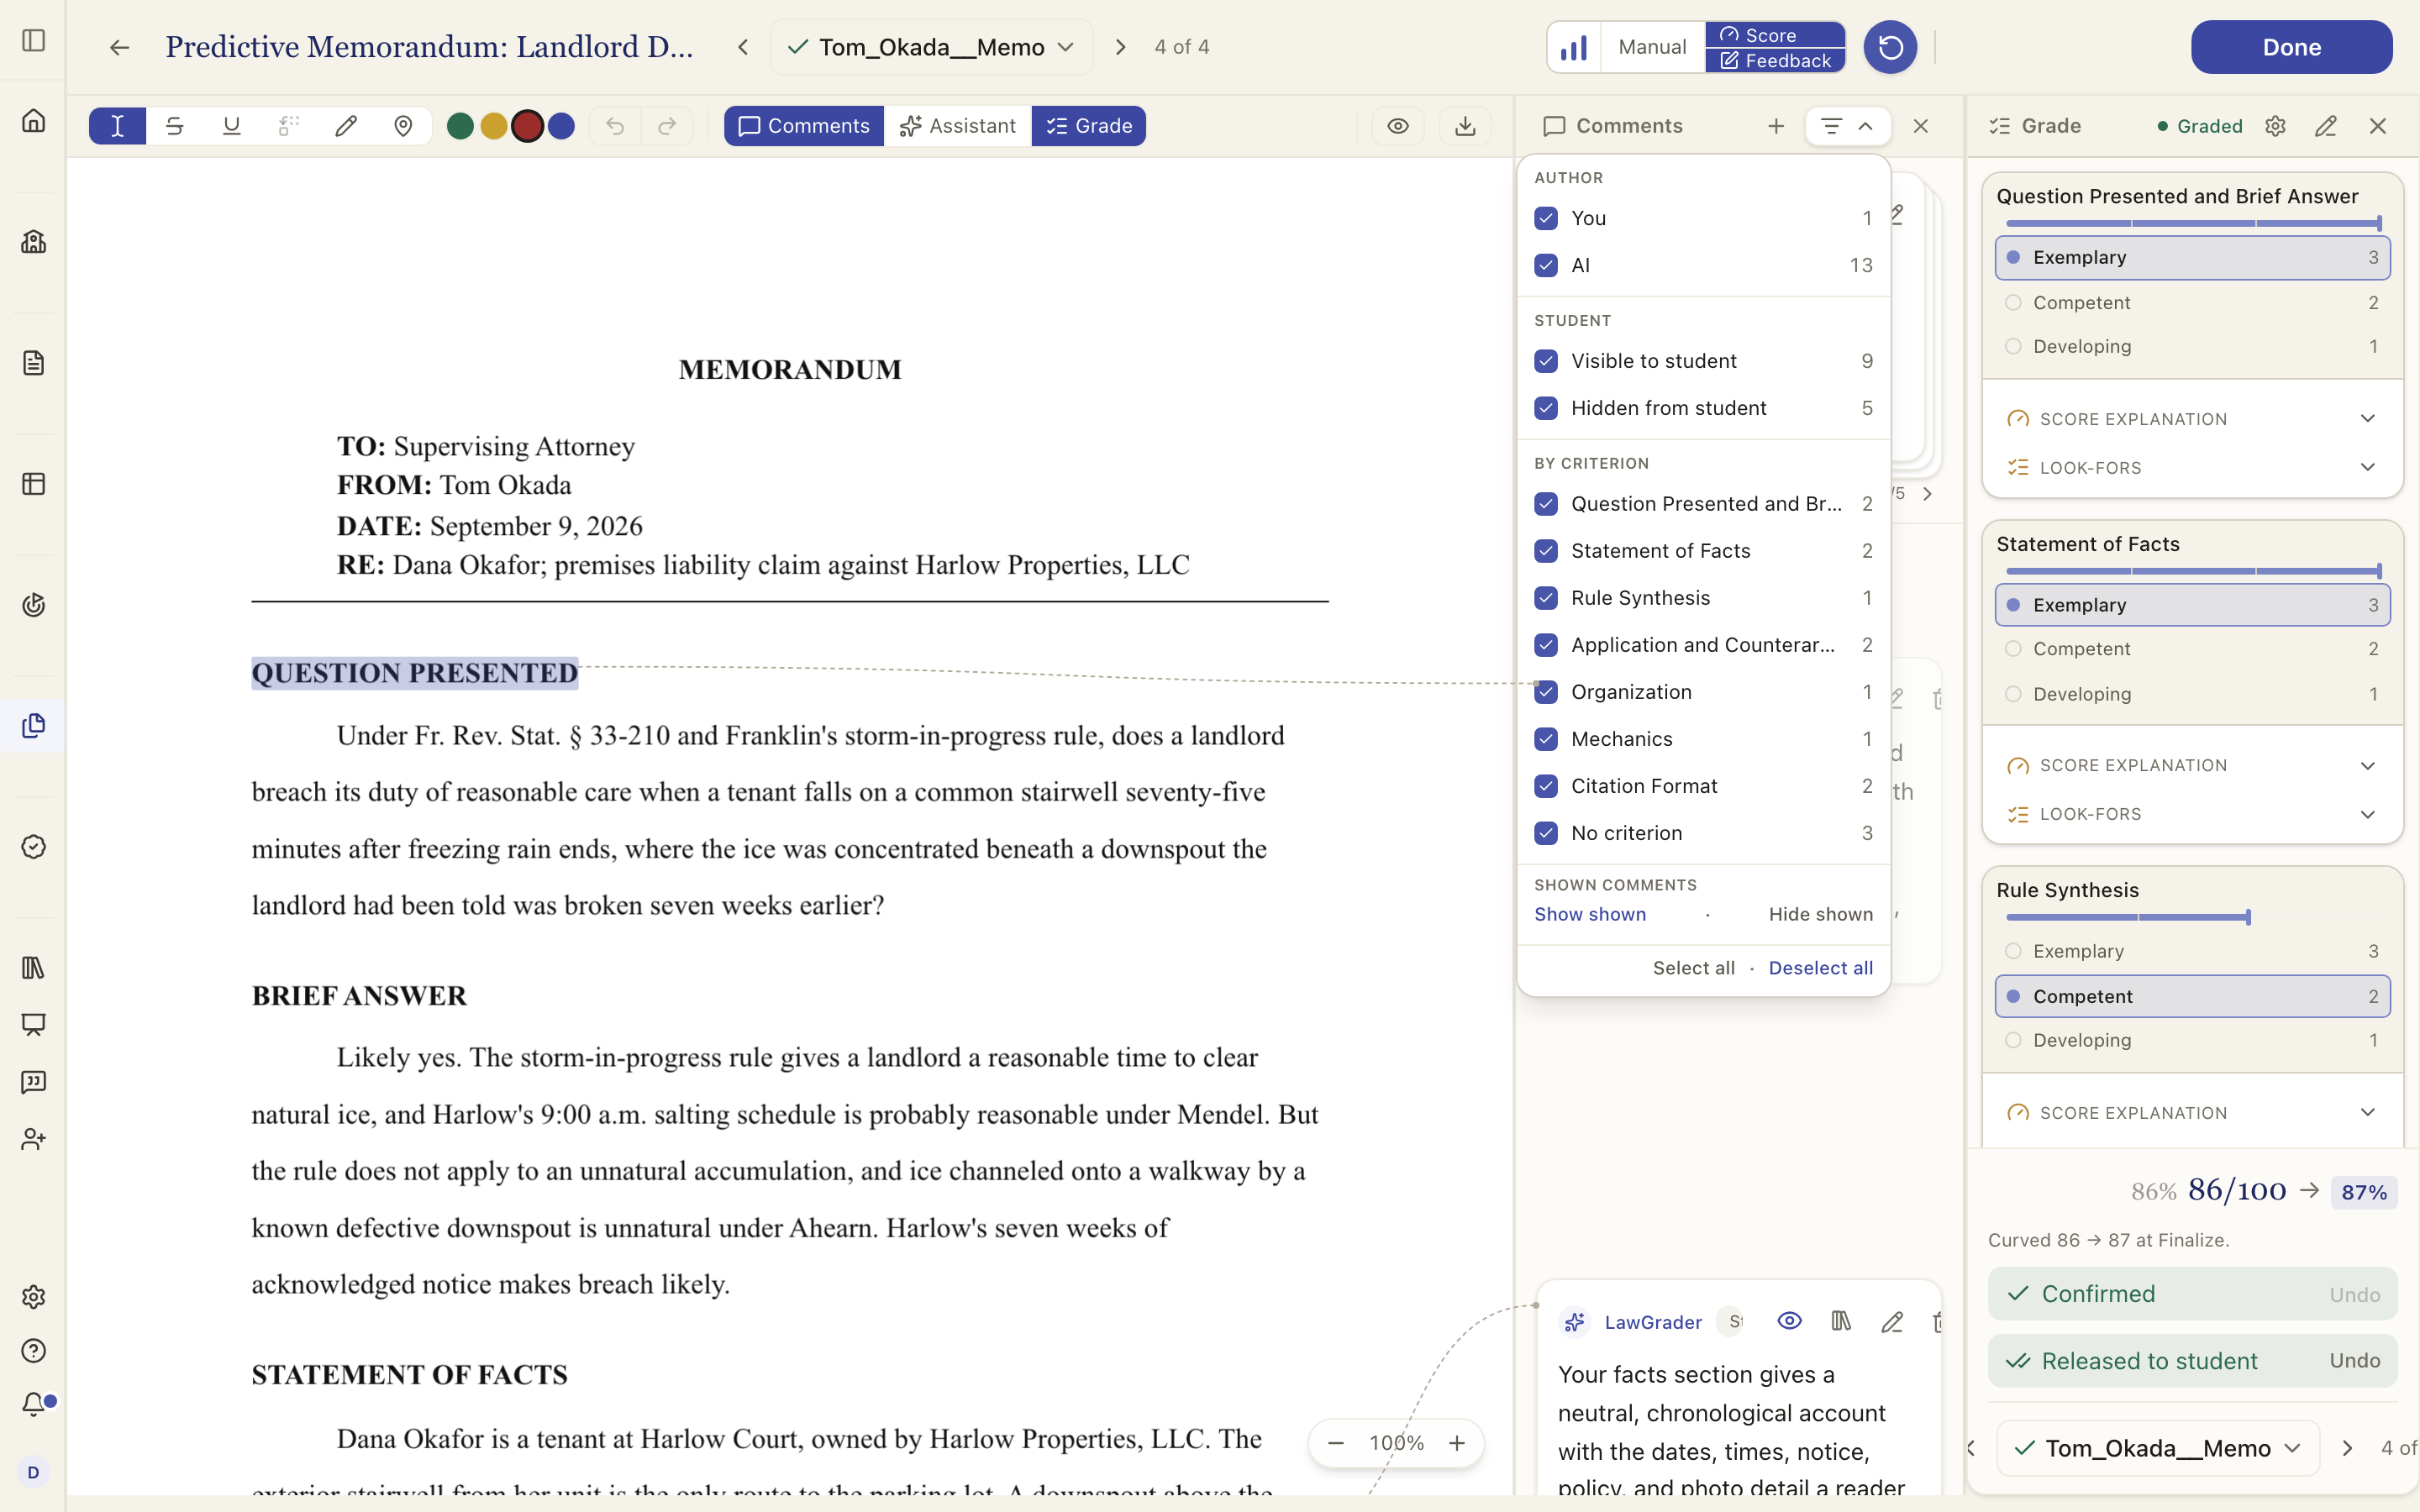
- Author: yours, the assistant's, or both.
- Student: comments the student will see, comments hidden from them, or both. Filtering to hidden is the quickest audit before release.
- By criterion: only the cards filed under one criterion, with a count on each; No criterion is the whole-document notes.
- Only: hover any row and choose Only to narrow to that one row without unchecking the others.
- Clear: back to every comment showing. The count at the top of the menu says where you are ("7 of 19 shown"), and the filter button stays marked while anything is held back.
Unticking a box hides those comments; unticking all of them shows nothing. The filter changes only what you see. Hidden-by-filter is not hidden-from-student; the eye decides that — on each card, or at the top of the column for everything showing at once. See Marking up a paper.
The foot of the rail
The total sits at the bottom with the percentage, and the curved value beside it when a curve is set on the assignment ("Curved 86 → 87 at Finalize"). Confirm grade makes the grade yours; a confirmed paper shows Confirmed with an Undo, and a released one shows Released to student with an Undo of its own. Under the confirm button, Release just this student now sends one paper without waiting for the class. See Releasing grades and reports.